Mediterranean sourdough bread
Anyone who follows me on instagram or facebook will know that I am very passionate about bread baking. I bake my own bread for over 4 years now and we rarely buy commercially baked products as a family. I am particularly big fan of sourdough breads. Not only they are very healthy in compare to bakes made with bakers yeast. Also, I find hugely satisfying creating delicious breads with only 3 basic ingredients: flour, water and salt. I already published posts about the benefits of sourdough here and basic bread recipe here. So this time I am not going to repeat myself. Instead I will give the recipe for a Mediterranean style sourdough bread. I chose this one because it is my family’s favourite. Our little boy loves it, sometimes he just grabs a freshly cut slice and eat it on its own! If you would ask my wife what sourdough bread I bake she likes the most it would be this one. It goes perfectly with mature cheeses, beef cold meats and stews. I hope you will enjoy it!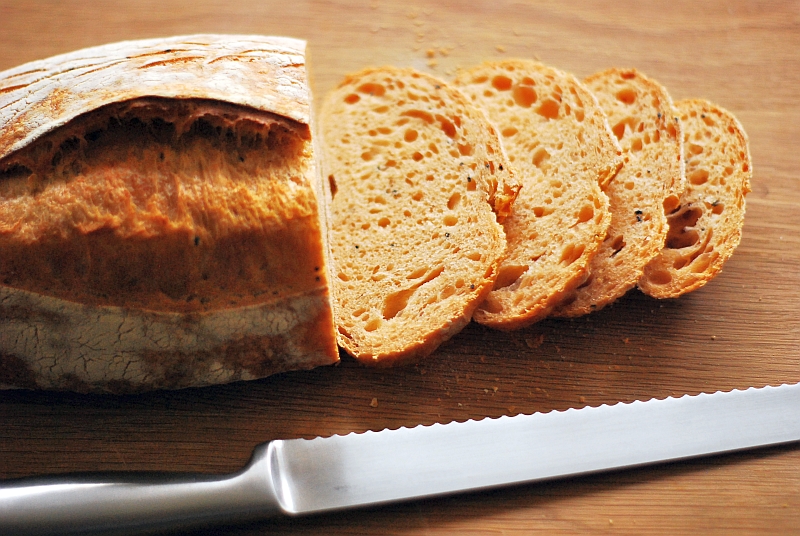
Remember, because the wild yeast work really slow so the whole process will take about 2 – 3 days. It doesn’t mean that you have to be present all the time. Actually, your time involvement is relatively small. Most of the time the nature looks after your bread. It simply needs time to mature and develop good flavour and strength.
This recipe makes one large loaf and one small loaf or two medium loaves.
Equipment required:
- Pair of hands
- 800g benettone (proving basket) or colander lined with tea towel
- Baking stone. If you haven’t got one a heavy baking tray would do. Just place it upside down so that it is flat
- Bread (pizza) peel. This is used to transfer proved bread into the oven. If you don’t have the peel use flat edged baking tray or if you only have one with a lip, turn it upside down.
- Clean medium size jar with a lid
- Large mixing bowl, preferably with a lid.
- Razor blade also known as lame. You will use this for slashing the tops of loaves. You can get away with a sharp knife but I switched to lame as it does the job more cleanly
- Precision kitchen weighing scales
Sourdough starters
Ingredients:
- 1 portion of white sourdough starter (“mother”). Here you can find instructions how to make your own.
- 500g + 2 tblsp good quality strong white flour (I use Shipton Mill canadian strong flour, but any good quality product should do)
- 300g + 6 tblsp lukewarm water (Dip your fingers in the water. It is at perfect temperature if it doesn’t feel neither cold or warm)
- 10g fine salt
- 2 tblsp olive oil
- 2 tblsp tomato purée
- 1 tsp nigella seeds (black onion seeds)
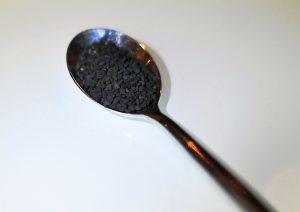
Nigella (black onion) seeds
Method:
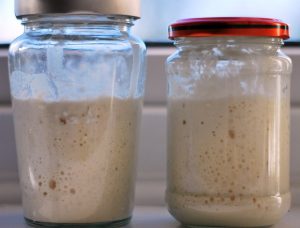
- Transfer half of your sourdough starter into a clean jar. Add one heaped tablespoon of flour into the original starter and one into the new jar. Add 3 tablespoons of water to each jar and mix well. Leave in warm place for about 20 hours. This will effectively double the amount of “mother” you can use.
- Next day transfer contents of the “new” jar and half of the original starter into the mixing bowl. You should get between 120 – 140g of the active sourdough starter. If you intend to bake sourdough bread in the future feed the original “mother” as per instructions here.
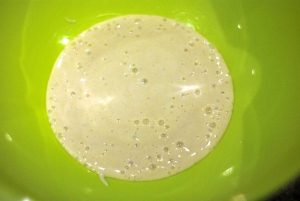
Active sourdough starter - Add 300g water into the bowl and stir until the active starter is thoroughly diluted in the water.
- Add the tomato puree and stir until fully incorporated into the mixture.
- Add olive oil and stir.
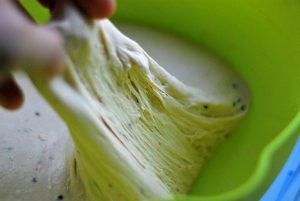
- Add 500g flour and nigella seeds. Mix until all ingredients combine and you have a rough dough. Cover the bowl, get yourself a cuppa and watch an episode of your favourite show on Netflix. This process is called autolyse. You will find that after a period of time the dough will be much easier to knead and it will become much more stretchy. You can leave the dough to autolyse for 30 – 60 minutes.
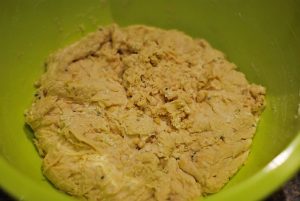
Rough dough - Add the salt. The dough is now ready to be kneaded.
- Lift a portion of the dough up from the side and fold into the middle. Press with your knuckles.
- Turn the bowl 90 degrees and lift another portion of the dough from the side and fold in the middle and press with your knuckles.
- Repeat steps 8 and 9 another 8 times. Cover the bowl and leave to rest for another 10 minutes.
- Turn the dough over and repeat steps 8 – 10 another 2 times. The dough should be smooth and should come away from the bowl sides easily. Do not add any additional flour throughout this process.
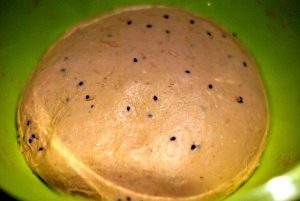
Kneaded dough - Cover the bowl and let it rest in a moderately warm place (18 – 20 centigrade) for about 8 – 10 hours. Transfer the bowl to the fridge (or garage in the winter) and rest for another 10 – 12 hours.
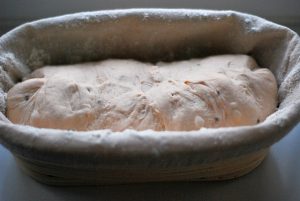
- By now the dough has risen and fermented and is ready to be proven. Dust the proving basked (or lined colander) heavily with flour.
Fermented dough - Lightly dust the work surface with flour. With help of the scraper remove the dough from the bowl and place it on our working surface.
- Flatten the dough gently with your hands.
- With the scraper cut about 80% chunk of the dough and weigh it. You are looking for about 750 – 800g. This is your large loaf.
- Fold the dough few times to make an oblong or round shape (depending on your proving tool) and leave to rest for about 10 minutes. If you unsure how to shape a loaf please follow instructions here.
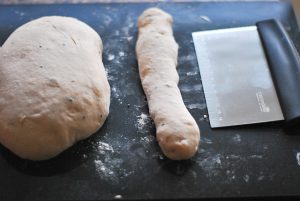
Resting pre shaped loaves - Repeat the process for the remaining part of the dough.
- Cover both proving colanders (baskets) with tea towels or shower caps and leave to prove in a warm place for about 1 – 2 hours.
- Transfer your proving baskets (colanders) to the fridge (or garage) and leave to prove for another 8 – 12 hours. Once proven start baking with the smaller loaf.
Loaf in a banettone - Preheat the over to 250 centigrade. Place a roasting tin on a bottom of the oven and baking stone or upside down baking tray in the middle of the oven. Put a kettle on.
- Dust the top of the proven dough with flour (or even better semolina). so it does not stick to the peel (or baking tray) and you can slide it easily onto the baking stone. Holding bottom of the colander with one hand place your peel (or baking tray) on top of it holding with your other hand. In one rapid movement turn the colander with the peel upside down. Gently remove the colander and then tea towel. You should have your proven loaf on the peel.

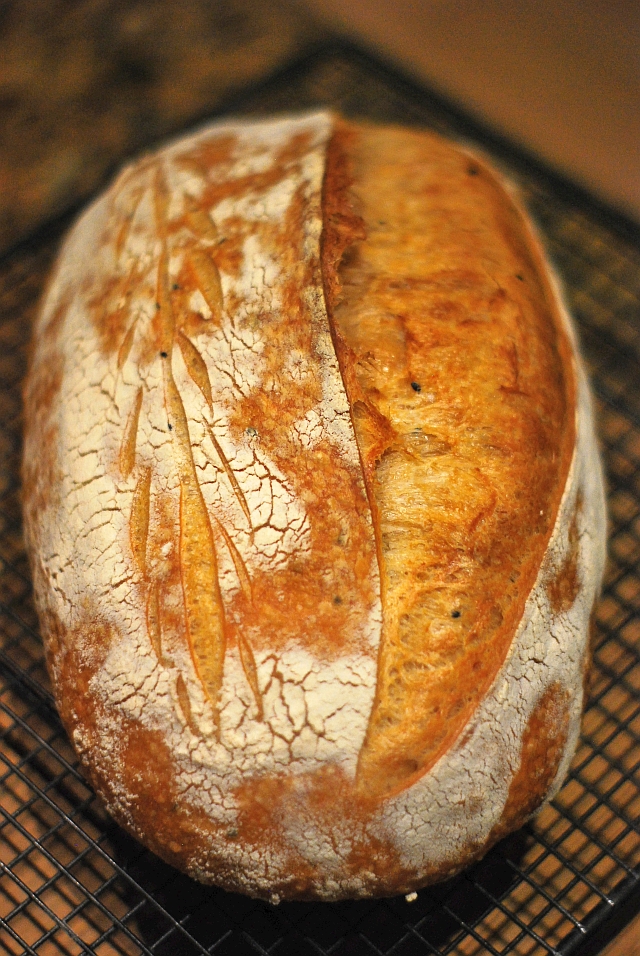
Scored loaf on a peel - Pour about cup of hot water into the roasting tin on the bottom of the oven. This will create steam that will help your bread to expand and develop a nice crust.
- Make deep slashes on top of your loaf with pattern of your choice. Slide the loaf onto preheated baking stone (or upturned baking sheet). Reduce the temperature to 220 centigrade and bake for about 25 minutes until golden.
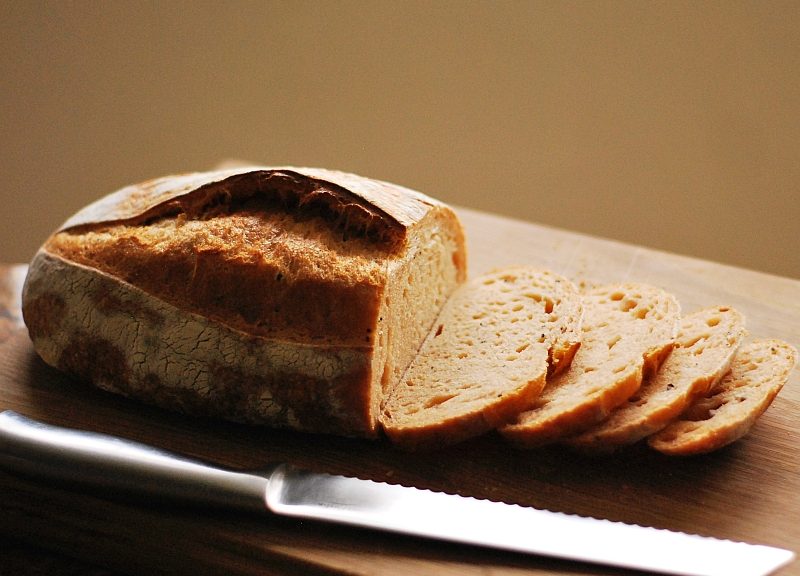
- Take it out and tap the bottom. It should sound hollow. Let it cool on a wire rack.
- Repeat the process with the larger loaf with the baking time extended to 35 – 40 minutes.